Just under the wire for last weekend's STLMQG meeting, I finished my Riley Blake Challenge quilt, aka the Glam Garlands quilt!
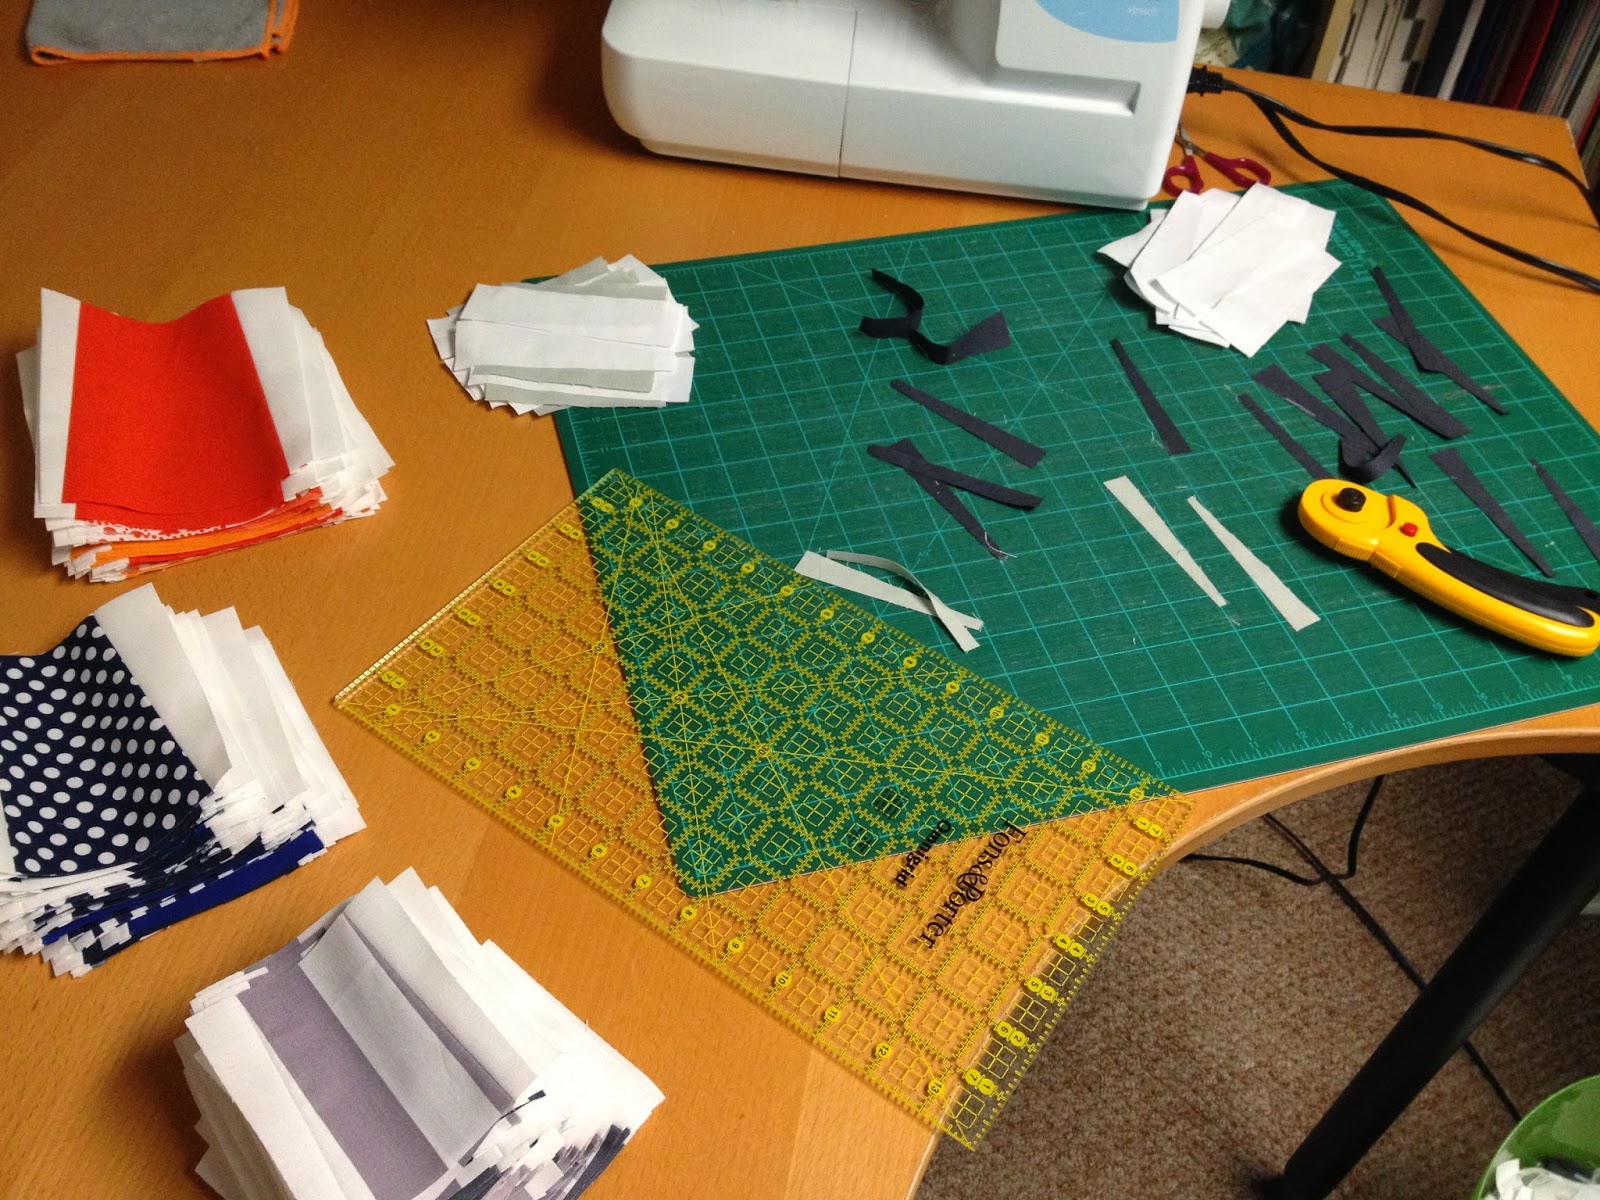
As I alluded to last week, this quilt was WAY more work than I anticipated. It wasn't particularly difficult, but it required so ... much ... pressing and cutting. Each square is made up of a square of color and two rectangles of white, which are attached improvisationally. Next, you have trim off the seam allowances, press the white pieces, and then trim down the square. Finally, put all those squares together and press and press and press.
Still, despite all the work (or perhaps because of it), I'm quite pleased with how it turned out. Obviously, I chose to focus on the gray, navy, and orange fabrics from the RB bundle and used the Glam Garlands pattern from Modern Patchwork for the front of the quilt.
I loved getting to try out one of the quilts from Elizabeth's new book, which I got for Christmas, and it didn't disappoint. Elizabeth's patterns are so clear and well-organized that they're really a pleasure to put together.
The front fabrics are a variety of RB fabrics from the bundle, my stash, and my LQS, combined with Kona White. For the backing, I actually used a navy sheet for my solid and then inserted a pieced strip of leftover orange fabrics, set off with a strip of white above and below.
I quilted it in white thread in an off-center, vertical chevron design. I prefer to space out my quilting lines, so these are 5" apart. The quilt is bound in Kona steel. I really wanted to use another orange fabric, which I thought would be a bold border against the white, but I ran out of fabric and couldn't bring myself to buy more. :) Still, I think the gray worked out well.
The quilt finished at a healthy lap size, and I can't wait to cuddle up under it for some Olympics watching this week. Stay warm!
Tuesday, February 11, 2014
Pillows with love
Pillows! More pillows! Just popping in to show off the last of the pillows I made for the STLMQG's Pillow Bomb project. I ended up making 10 total, so these five were added to the five I made back in January.
As a guild, we ended up making over 700 pillows and collecting over 430 pillow forms, all of which are going to be donated to the Siteman Cancer Center here in St. Louis to be used in the chemotherapy and radiation ward. The big drop-off will take place on Valentine's Day.
Here's hoping these pops of color will bring a little joy and hope to people who could use as much of those as possible.
As a guild, we ended up making over 700 pillows and collecting over 430 pillow forms, all of which are going to be donated to the Siteman Cancer Center here in St. Louis to be used in the chemotherapy and radiation ward. The big drop-off will take place on Valentine's Day.
Here's hoping these pops of color will bring a little joy and hope to people who could use as much of those as possible.
Wednesday, February 5, 2014
WIP Wednesday #56
Hey,
it's Wednesday. Sorry for the radio silence lately, but it's been crazy around here, related mostly to me trying desperately to finish up my MQG Riley Blake Challenge
quilt. Help! This quilt is taking for-eh-ver.
Completed:
Nothing yet
In progress:
Yep, the MQG Riley Blake Challenge quilt. I chose to focus on the gray, navy, and orange fabrics from the RB bundle and decided on the Glam Garlands pattern from Modern Patchwork.
I'll go into more detail in the final post for the quilt, but suffice it to say, this quilt has taken way longer than I expected. I've never cut so much fabric in my life. It seems like the last two weeks have been cut, press, cut, cut, press, sew, cut, press.
Completed:
Nothing yet
In progress:
Yep, the MQG Riley Blake Challenge quilt. I chose to focus on the gray, navy, and orange fabrics from the RB bundle and decided on the Glam Garlands pattern from Modern Patchwork.
I'll go into more detail in the final post for the quilt, but suffice it to say, this quilt has taken way longer than I expected. I've never cut so much fabric in my life. It seems like the last two weeks have been cut, press, cut, cut, press, sew, cut, press.
The top is done (just needs to be pressed), but I still have to do the backing, basting, quilting, and binding before Saturday's STLMQG meeting. I have a feeling I have several more late nights ahead of me.
And does buying fabric count as progress? If so, I'm making a lot of progress lately. These fabrics are for the next few projects on my list: a new Go Anywhere bag, a new wide-open pouch, and a Cat baby quilt (the fabrics in the second picture are for the backing).
On the "to do" list:
Five more pillows for the STLMQG Pillow Bomb Project
New Go Anywhere bag
New wide-open pouch
Cat baby quilt
Mystery quilt
Get back to the T-shirt quilt and Kitchen Window quilt
New tie for B (with a tutorial, finally!)
Superhero cape for B
Re-covering the downstairs chair
New Go Anywhere bag
New wide-open pouch
Cat baby quilt
Mystery quilt
Get back to the T-shirt quilt and Kitchen Window quilt
New tie for B (with a tutorial, finally!)
Superhero cape for B
Re-covering the downstairs chair
New pillows for the downstairs chairs
A mug rug for me
Ironing board cover
Another divided basket from the Noodlehead pattern
Reusable snack bags
Living room quilt
Washi dress
This week, I'm linking up to WIP Wednesday at Freshly Pieced!
A mug rug for me
Ironing board cover
Another divided basket from the Noodlehead pattern
Reusable snack bags
Living room quilt
Washi dress
This week, I'm linking up to WIP Wednesday at Freshly Pieced!
Wednesday, January 22, 2014
WIP Wednesday #55
Howdy,
Wednesday. Things were busy at the end of last week, so I'm easing back into the sewing this week.
Completed:
Last week's craziness was all about finishing the Bluebird Park Baby Quilt, which I did!
The quilt was for two friends for whom we threw a baby shower on Saturday, so it was nice to be able to finish the quilt and pass it on so quickly. I'm hoping their new little guy will love all of the fun colors and prints in the quilt. You can read all about this quilt details in this post.
In progress:
After the shower was over, I got right to work on my MQG Riley Blake Challenge quilt. I'd already pulled all of the fabrics for it, deciding to focus on gray, navy, and orange.
Completed:
Last week's craziness was all about finishing the Bluebird Park Baby Quilt, which I did!
The quilt was for two friends for whom we threw a baby shower on Saturday, so it was nice to be able to finish the quilt and pass it on so quickly. I'm hoping their new little guy will love all of the fun colors and prints in the quilt. You can read all about this quilt details in this post.
In progress:
After the shower was over, I got right to work on my MQG Riley Blake Challenge quilt. I'd already pulled all of the fabrics for it, deciding to focus on gray, navy, and orange.
I decided on one of the patterns in Modern Patchwork (so many great ones it was hard to choose!) and got to work cutting everything up. I'm getting pretty excited about seeing this one come together. Now, back to the cutting mat!
On the "to do" list:
Five more pillows for the STLMQG Pillow Bomb Project
Get back to the T-shirt quilt and Kitchen Window quilt
New tie for B (with a tutorial, finally!)
Superhero cape for B
Re-covering the downstairs chair
Get back to the T-shirt quilt and Kitchen Window quilt
New tie for B (with a tutorial, finally!)
Superhero cape for B
Re-covering the downstairs chair
New pillows for the downstairs chairs
A mug rug for me
Ironing board cover
Another divided basket from the Noodlehead pattern
Reusable snack bags
Living room quilt
Washi dress
This week, I'm linking up to WIP Wednesday at Freshly Pieced!
A mug rug for me
Ironing board cover
Another divided basket from the Noodlehead pattern
Reusable snack bags
Living room quilt
Washi dress
This week, I'm linking up to WIP Wednesday at Freshly Pieced!
Tuesday, January 21, 2014
DIYers
In addition to all of the small organizational projects we've been doing the past few weeks, we had two big projects we also wanted to tackle before Matt's semester started and we hosted a baby shower last weekend. Up first, finally painting our dining room.
The big before and after (so much better!)

But after a series of late-night brainstorming sessions, lots of
discussion, and the discovery of these shelves at Target (which just
happened to fit the existing openings perfectly and were on big sale at the time, bonus!), we had a new plan.
First, Matt removed the ugly and annoying doors. We wanted open shelving
because it was more functional and attractive, not to mention it makes
the room look bigger.
The color in this room has bothered me since we moved in over a year and a half ago. I'd learned to live with it, but I never liked it, and back in December, I finally managed to convince Matt it was time for a change. We settled on a light tealy gray color (Behr Swan Sea, in case you're wondering), which I thought would be more soothing and tie in well with the colors in the adjoining living room.
After we put B to bed on the Saturday before the baby shower, we got to work.
As with every paint job we do, we underestimated the amount of paint we'd need (our plaster walls absorb paint like crazy, and the dark mustard yellow was not easy to cover), so after we went through 3/4 of a can with just one coat, we had to stop for the evening and wait to go get a second can in the morning. Meanwhile, the chaos in the living room remained.
We finished the second coat during B's nap on Sunday, and voila! the calm, serene, beautiful dining room I'd dreamed of. I'm so pleased with how the color came out (though the lighting in this room makes it difficult to get a very accurate pic).The big before and after (so much better!)

The other big project was converting these faux cabinets in our basement into useful shelving. These pictures don't give you a great sense, but the cabinets were pretty darn ugly. The sliding doors (which did not slide well) were covered in this cheap-o textured wood, and they opened to reveal nothing but exposed studs and the tile that runs under our basement carpet. The previous owners had used the space to store leftover carpet, which is about all it was good for.
Not very pretty, huh? Not to mention totally useless. We knew knocking out the cabinet completely (as we really wanted to do) was going to be a bigger project than we could really handle because it would have involved re-paneling the entire wall, leveling the floor, etc. Instead, our original plan (which we've been talking about for months) was to install a backing onto the studs, install floating shelves, and then paint the entire thing white.
Then, he removed all of the trim that had originally created the structure for the sliding doors. Next, he installed 2x4s along the bottom of the cabinet to create a floating floor above the tile. The actual basement floor was very uneven, and we didn't want to place the cabinets directly on top of the tile, so the boards created a new, level surface on which to build. He also installed spacer boards on the front of the studs to keep the shelves from sliding backwards (the shelving units aren't as deep as the original cabinet).
After that, all that was left was to assemble the Target shelves, fit them into the openings, shim the floor boards to make sure everything was level, and fill the shelves with toys!
I am so happy with the result! We have so much more storage in the basement now, and it freed up a lot of floor space. We still plan to create a false front to trim out the shelves and make them look more like custom built-ins, but that job's going to have to wait until my dad's next visit. :)
Subscribe to:
Posts (Atom)
.jpeg)
.jpeg)