Matt and I try to be as "green" as possible, and my older sister's the same way (and perhaps even more so — among other things, she's been known to pick recyclables out of other people's trash to recycle in hers). Several months ago, she asked our grandmother to sew her a few handkerchiefs using some old t-shirts she had, which our grandmother gladly did. They came in so handy that Vanessa asked me to make her a whole bunch more.
They're incredibly easy and basic to make, so I'm not sure a tutorial's even necessary, but I figure someone might benefit from it (and maybe it'll encourage you to make a few rags of your own). These are the perfect size to use as handkerchiefs or cleaning rags for around the house, but of course, you could change it up to make them any size that works for you. Depending on what size t-shirt you have and the size of your rags, you could get up to 10 rags from one shirt. Oh, and in addition to recycling some old t-shirts, this is also a great way to use up small thread spools you may have or to clear off one of the bobbins you've been holding onto that has just a bit of thread (do other people do that, or is it just me?).
Materials:
* t-shirt
* thread
* general sewing supplies
A few general notes before we start:
1. Again, you can make these rags any size you want. I started by cutting the sleeves off the shirt (you can get one rag out of each sleeve) and then basing the size of my other cloths on that, but you could also measure a washcloth or handkerchief you already own and use that size. Also, feel free to just start cutting whatever size seems right.
2. Because I viewed this as a recycling project and the final items were only being used for cleaning rags, I wasn't too worried about the thread matching the t-shirt or using an obvious edgestitch to close the whole left for turning. If you want a prettier final product, you can of course use coordinating thread and/or handstitch the opening closed. You might also want to concern yourself more with making sure each one is the same size, which is easily done.
Instructions:
1. Lay your shirt out flat. Align your ruler from the armpit junction of one sleeve to the top seam of the sleeve and cut off the sleeve. Repeat on the other side.
2. Cut the shirt open along one side so you can lay it out flat. I find this makes it easier to cut the remaining pieces, but you could also cut the shirt up while it's still intact. Cut the shirt up into as many (even-numbered) pieces as you can (make sure that each piece has a matching piece of the same size).
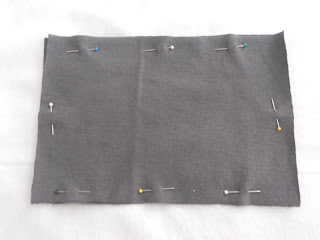
3. Iron each piece and then match them up according to size. Lay each set together with wrong sides facing (depending on your shirt, you may not be able to tell the "right" side from the "wrong" side, and that's fine) and pin them together well.
4. Using a 1/4"-1/2" seam allowance, sew along the outside of each set, leaving a 2" hole on one side for turning. Be sure to backstitch.
5. Press, clip your corners, and turn. Using a bamboo stick or something similar, push out the corners and press again, making sure you flatten out the hole you left for turning and push the fabric in so it's even.
6. Edgestitch the opening closed and press again.
7. You're done! Go blow your nose or clean something!
A few notes about the sleeve pieces:
1. As I said above, I wasn't worried about having perfect rectangles, so I cut the sleeves to use as much fabric as possible, which meant that they were imperfectly shaped. You can square them up if you prefer. Also, because you only detached the sleeve from the body of the shirt, the material's already connected along two sides (the top and bottom of the sleeve), so you'll only need to sew up the other two sides (instead of all four sides, like all of the other pieces). First, sew straight across the end of the sleeve, making sure you start and end right at the edge of the fabric.
2. On the side of the sleeve that was connected to the shirt, sew all the way across but leave your 2" hole for turning.
3. As you can see, on the gray shirt, I left the serged end of the sleeve intact, sewing my seam allowance outside of the serging. However, I found that when I turned and pressed the rag, this end was pretty bulky and wouldn't lay quite flat. So on the green shirt, I decided to sew just inside the serging and then trim the seam allowance through the middle of the serging.
While this made a smaller rag, it helped with the bulky seam, and I'd recommend it if you don't mind the smaller size. You can see the size difference below in the final sleeve rags.


I love it! "Go blow your nose or recycle something." Fantastic. :)
ReplyDelete