Ever since I saw this tutorial over on Grosgrain for turning a sweater into a cardigan, I've been wanting to try it. I have a weakness for cardigans. So one day in Target, I happened upon this baby in the clearance section:

So I followed the tutorial and measured up the middle:
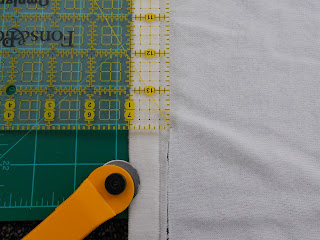
Then cut (eeek — scary moment!):
Then all you do is pin the raw edge on both sides inside a piece of double-fold bias tape:And stitch up the middle of the tape.
Be sure to fold the tape towards the inside of the sweater, unless you want it as decoration, I guess. :)And this is what I originally got:
Not bad, especially from the front. But after wearing it a couple of times, Matt and I both agreed it really wasn't very flattering. The empire waist looked funny with nothing to hold it together, and the back was really unflattering (fashion note: covering an ample-size bottom with a large swath of white knit fabric does not make for a flattering rear view).
So I moved on to Plan B. It clearly needed to be shortened to avoid the fabric-covering-butt issue, so I decided to try the same bias tape trick on the bottom of the sweater.
Originally I was going to cut off the bottom cuff and try to re-attach it higher, but the seams didn't line up, so I just cut the fabric off about 3 inches higher, applied the bias tape as before, and stitched right along. Tah dah!Oh, and I added buttons.
I LOVE these buttons. They're wood, and the textured design is too cute.
I stitched a little piece of elastic on the inside of the sweater, then sewed a button on top on the outside. Then, I sewed a matching button on the other side of the sweater.
Why, you might be asking, did she use teal thread to sew on the elastic? Because, I might answer, I forgot to do this step at first, and by the time I remembered, I'd already moved on to hemming my teal bridesmaid's dress and didn't feel like re-threading the machine for a tiny piece of elastic. Plus, it's covered by the button, right? Right.
Great tutorial, highly recommend.
Great tutorial, highly recommend.


I love this! Great job!
ReplyDelete