A couple of months ago, I made this baby sleeping bag for Beckett based on a product I'd seen online. That baby sleeping bag was lined for warmth, and if you want to make one of your own, you can find the tutorial here. But now that we're moving into the warmer months, I thought I'd make a summer (i.e., unlined) version of the bag as well. This bag uses French seams on the inside to hide the raw edges. Wanna get started?
What you'll need:
1 yd. fabric (I upcycled a muslin swaddling blanket, but you could use a jersey knit, quilting cotton, linen, or anything else that's light and soft.)
Coordinating thread
1/2" elastic (to determine the length, measure around your child's chest and add 1/2"; mine was 17")
Sleeping bag template (for a detailed discussion of sizing and how to make your template, see the lined baby sleeping bag tutorial)
I re-used the template I made for my winter sleeping bag, but since we're doing French seams on this one, we need to add an extra 5/8" or so to the sizing. Fold your swaddle blanket in half (or if you're using yardage, fold it in half from selvage to selvage). Place your template on top, and cut around it about 1/2" on each side and the bottom and about an inch along the top.
Your two pieces (for the front and the back) should look like this:
It doesn't need to be exact, and the French seams will hide any inconsistencies in your cutting. Now, on to those seams. Place your two pieces WRONG sides together.
See how the elephants are on the outside, not the inside, like they would normally be, if you were sewing two pieces right sides together?
Pin around the sides and bottom.
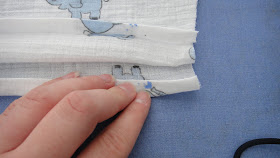
Before sewing up our bag, we need to fix the raw edges along the top. (Note: This step can also be done before pinning the pieces together; it doesn't really matter.) Fold over the top edge 1/4" and press.
Then, fold the edge over another 1/4" and press again.
Stitch about 1/8" from the bottom of the fold to secure it. Repeat on the other half of the bag.
Now, using 1/4" seam allowance, sew around the sides and bottom of the bag. Press.
Clip your corners.
Turn the bag inside out (this will now make the two sides right sides together) and use a pointy tool (I like a wooden skewer) to push out the corners.
Press again. As long as you press it well, there's no need to pin it again for the next step, but if pinning makes you feel better, by all means, pin away.
Using a 1/2" seam allowance (note the bigger SA), sew around the sides and bottom, enclosing the raw edges inside your new seam. This is how the inside of your bag should look when you're done:
See? The ugly raw edges are all enclosed, which will make the bag last longer and look so much nicer. Now, let's make the casing for the elastic. Fold down the top of the bag toward the inside 1" and press. Pin the fold to secure it.
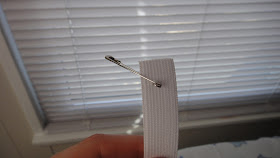
Stitch around the casing about 1/8" from the bottom of the fold, leaving a 1-2" gap on one side. Attach a safety pin to the end of your elastic.
Insert the elastic in the gap you left in your casing and use the safety pin to pull the elastic all the way through the casing and back out the other side.
Check to make sure the elastic hasn't gotten twisted. Then, overlap the two ends and secure them using a zigzag stitch.
Now you just need to sew everything up. First, stretch out the top of the bag so that the elastic is pulled into the casing and is no longer sticking out. Then, stitch up the gap you left in the elastic casing, and your baby sleeping bag is done!


Thanks for the tutorial. Really cute and looks doable for a beginner sewer.
ReplyDeleteCheers,
Dawn
Sure! It's definitely a beginner-friendly project. Good luck!
Delete